Last Updated on December 13, 2025 by Wahid
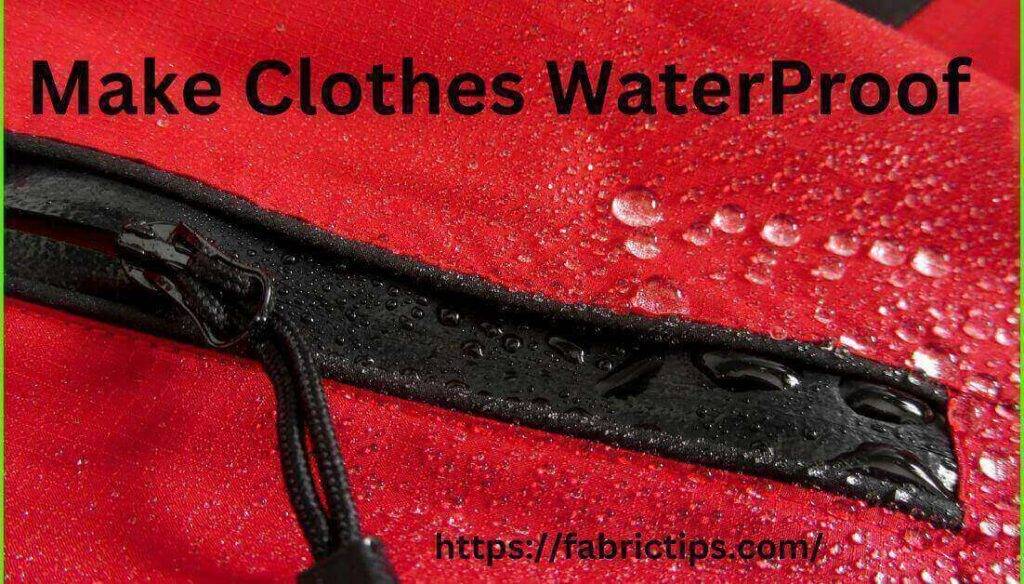
Are you fed up with getting wet during the rain? Our experience with damp comfort is first-hand. We’ve found the best techniques for waterproofing clothing.
Whatever you enjoy doing with your children – camping, skiing, snowboarding – make sure their clothing is waterproof. Luckily, our discussion on making fabrics waterproof for you. Waterproof clothes are useful in a variety of ways and are also cost-effective. For playing in water & snow, waterproof clothes are necessary for having a great time. Luckily, water damage can be avoided by following these quick and simple tips.
Before we get into the tactics, as a reminder, spray a “silicon solution” once a year on fabrics to keep them waterproof. When you deny this and want to waterproof fabric yourself, we’ll discuss how to make clothes waterproof using simple methods.
How To Make Fabric Waterproof: Step By Step Explanations
This section teaches you how to turn non-waterproof covers and cushions into water-repellent home accessories. The remedies listed below can also be used on outerwear, including hats, coats, and shoes.
In light of the protection information we have discussed, let’s examine DIY methods for making fabric waterproof. Browse the step-by-step tutorials to find one that suits your needs.
“Alum Powder”
In your grocery store locally, you can find “alum powder.” You can use it for pickling and baking. Basically, it is an additive to food. As a deodorant rock, it’s also available. You can even use it to soothe itchy, irritated skin, specifically after shaving.
Several types of alum powder are available, and alum is a form of aluminum. Alums such as “soda alum” & “ammonium alum” are also available. For waterproofing textiles, we’re interested in “pickling fluid.” “Potash alum” or “potassium alum” are the two terms for it.
What You’ll Require:
- Alum powder
- Laundry tongs
- Hot water
- Rubber gloves
- 2 large containers or buckets
- Laundry detergent of choice
- Clothesline
- Clothes pegs
- A sunny, dry day
- A friend
Process Of Using Alum Powder
Step 1:
Prepare a large bucket of hot water. In order to entirely cover the fabric, there needs to be sufficient water. Use laundry tongs to swirl laundry detergent into the water. Once again, how much detergent you should use depends on what size fabric you have. Generally, around 1 kilogram of detergent should be used per 2 gallons.
Step 2:
Mix hot water & detergent in a bowl. Utilizing your laundry tongs, push the bag into the tub or container. Keep your hands out of the hot water, as it must be extremely hot. Whenever trapped air pokes up through the water’s exterior, gently push the fabric down. Wet the fabric thoroughly and leave it to soak for a few hours.
Step 3:
Using rubber gloves, remove fabric from the detergent solution. A friend might be able to help you at this stage. Take the fabric and fold it into the flat sheet. Using your friend as a grip, grasp the fabric between you and pull it flat.
Using regular pegs, attach it to a clothesline. Make sure the fabric is not folded, creased, or doubled up. This step requires both sides of the fabric to be opened to air as one sheet. Dry the material outside for at least 24 hours.
Step 4:
Put 2-gallons of warm water in the 2nd container. Alum powder equals 1 or 2 pound should be added next. Alum should be dissolved by stirring well. Place the fabric in the water and alum mix while wearing rubber gloves. The fabric should be pushed down until it is under the surface of the water.
Step 5:
Let the fabric soak for at least 2 hours. Throughout the process, keep an eye on the substance to ensure there are no air bubbles. In this step, the fabric should remain underwater at all times.
Step 6:
Re-unfold the fabric with your friend’s help. All creases & folds should be removed by stretching them between you. The sheet must be absolutely flat. Place it near the clothesline so both sides can be exposed to air and sunlight. Make sure no fabric touches any other fabric. Drying the material makes it waterproof.
“Beeswax”
Historically, “Beeswax” was used to make waterproof fabric. Water-repelling clothes have been treated with this remedy since ancient times.
However, the method may be a bit dicey. There is a risk that children & pets will be injured when hot wax is used. Using this method, keep them away from each other.
In addition to being more suitable for small waterproofing jobs, waxes of different types can be used. The process can be expensive and time-consuming. For all these techniques, ensure that your product is completely dry and clean before you begin.
What You’ll Require:
- Beeswax
- 1-inch paintbrush
- Paraffin & candle wax
- Metal spoon
- Metal bowl
- Hairdryer
- Dryer
- Saucepan
- Rubber gloves
Process Of Using Beeswax
Step 1
Pour some warm water into the saucepan & place the bowl on top of it. The process of melting chocolate to drizzle on cakes is done in a double-boiler.
A small bowl should fit inside a saucepan but should remain on the outside rim of its edges. Avoid using a bowl to touch the saucepan’s base.
Step 2
Make a metal bowl by cutting chunks of beeswax. Once the water below heats up, the wax should melt. Combine your paraffin wax and candle wax.
Depending on the scale of the project, you will need different amounts of wax. Ideally, the waxes should be mixed 50:50. The majority of small- and medium-sized throw pillows contain between 4oz paraffin and 4oz beeswax as well.
Step 3
To achieve the best results, allow the fabric to warm up before applying the wax. You should be able to dry it for approximately 20 minutes on a medium heat setting. Once the dryer has stopped, give the material another 10 minutes if it is still cool. Touching the material should be warm; however, not hot enough to burn you.
Step 4
When the wax becomes liquid, it can be used. Melted wax can be applied using your paintbrush to the fabric surface. Methodically work your way through, right to left, top to bottom. That way, it will be certain that all materials are covered with wax. Be liberal with the coating. Put on rubber gloves to prevent your skin from being touched by wax drips.
Step 5
Use your hairdryer to dry wax-coated fabrics. As the fibers dry, the wax penetrates deeper into them with heat. Don’t forget to place it in a pillowcase to avoid spreading wax everywhere.
Step 6
After drying, let the product air for at least 24 hours prior to use. By doing this, any residual wax smell will be lifted. Additionally, ensure that it is completely dry.
“Commercial Products”
Fabric can be made waterproof by using commercial products. Products such as “Thompson’s Water Seal for Fabric,” “Scotchgard,” & “Nikwax TX Direct” all are specifically designed to waterproof fabrics.
A lot of “big box stores” and “Amazon” sell them online. Sprays are commonly available and are easy to use.
What You’ll Require:
- Your selected commercial product
- Facemask & goggles
- Airy, well-ventilated environment
Process Of Using Commercial Products
Step 1
Your fabric should be completely clean & well-dry. Find out what type of fiber it is. In some cases, chemicals can damage fabrics.
Step 2
Ensure you follow the instructions provided with the product when applying it to the fabric. Ensure the substance is safe for the material you are using based on its directions.
Step 3
Make sure you wear a facemask & goggles. Make sure the spray product is well-ventilated, & better yet, do it outside. Don’t pick a day with a lot of wind.
Apply your product according to the instructions on the package. Generally, you should set the can at least 6 inches far from your surface & spray by sweeping your hand from top to bottom.
Step 4
Each side of the fabric should be done separately. Turn the garment over to finish the back after drying the first side. It should take no longer than an hour. After spraying on both sides, allow 24 hours to thoroughly dry completely.
“Iron-On Vinyl”
Neither spraying nor melting solids is required in this method. Using it with children & pets is safe, and it requires little cleanup afterward. Moreover, vinyl won’t change the color of the fabric.
In most cases, vinyl is best suited to projects that do not require frequent washing. Ideally, vinyl coatings should be applied to cleanable surfaces.
Among the products you’ll see are tablecloths, lunch bags, and shopping bags. Both online and offline fabric retailers sell iron-on vinyl fabric.
What You’ll Require:
- Iron on vinyl fabric
- Tape measure
- Iron
- Vacuum cleaner
- Scissors
- Washing machine
- Laundry detergent of your choice
Process Of Using Iron-On Vinyl
Step 1
Clean and dry your fabric before using it. In case of stains & debris, use your regular detergent and washing machine setting. Alternatively, vacuum up any remaining dirt.
Step 2
Please lay it flat if your item has lumps, bumps, and wrinkles. Calculate how much vinyl you will need to cover the area. Measure the fabric item’s dimensions and cut the plastic accordingly. One side should be worked simultaneously. As vinyl can’t bend well, don’t cut it around the object.
Step 3
Put on the vinyl according to the manufacturer’s instructions. On the cloth, you need to place the sticky side down. The sticky-side of the vinyl should be positioned underneath the material after removing the backing paper. Then, adhere a backing paper to the vinyl. The vinyl should be facing the paper’s shiny side.
Step 4
Heat the vinyl on the fabric in a medium setting. After the vinyl has been adhered to the lining firmly, peel off the protective paper.
“Linseed Oil & Mineral Spirits”
In paints, varnishes, and wood stains, “linseed oil” is used as a preservative for concrete and wood. This yellowish liquid comes from fully ripened flax seeds and is also referred to as flaxseed oil.
You should be aware of the following precautions if you plan on handling linseed oil:
- Boiling linseed oil with mineral spirits may easily catch fire.
- It is not recommended to use boiled linseed oil near food.
- After you treat your fabric, it’ll stink for several weeks, therefore; it won’t work overnight.
It is only possible to waterproof hardwearing & long-lasting fabrics with this option. These include canvas covers, tarps, and tents. Be careful not to use oil from boiled linseed on your tablecloths.
What You’ll Require:
- Boiled linseed oil
- Large bucket
- Mineral spirits
- Drying space outside
- It’s a dry, windless day
- Rubber gloves
- Facemask
- A friend
Process Of Using Linseed Oil & Mineral Spirits
Step 1
Do not forget to wear your facemask & rubber gloves. The bucket should be filled with mineral spirits and “boiled linseed oil.” The ratio should be 50:50. You will need to use a certain amount of fabric treatment based on size. Ensure that the fabric is totally covered with the mix.
Step 2
In the mixture, soak the fabric until completely saturated with water. Then, open up the fabric & remove it. Make sure the fabric is wrinkle-free by stretching it out with a friend. For 2 to 3 days, hang it outside in the Sun. Avoid doubling up. There needs to be air on both sides.
Step 3
Mineral spirits and linseed oil should be disposed of safely. Never dispose of used solutions down the drain. You should dispose of linseed oil in a waste disposal facility since it is considered hazardous waste.
“Paraffin Wax”
You can use “paraffin wax” together with beeswax to create a waterproof solution, or you can simply use it by itself. The price of paraffin wax is less expensive than that of beeswax, and many grocery stores sell it.
However, beeswax provides additional flexibility, which is why paraffin wax usually mixes with it. There is less melting point in paraffin wax, though, making it a safer material.
Because paraffin wax makes fabric waterproof, it should only be used on small items. Paraffin wax is also smelly until it dries, so make sure the area is well ventilated.
What You’ll Require:
- Paraffin wax pellets
- Baking sheet
- Oven
Process Of Using Paraffin Wax
Step 1
Turn your oven on to 300°F. Then, as soon as it reaches temperature, drape your fabric over a baking sheet. Apply paraffin wax pellet to all surfaces of the cloths. Paraffin wax can be grated into small chunks if you cannot find pellets.
Step 2
You can melt the wax directly on the fabric by placing a baking sheet in the oven. In view of the size of your material, this might require more than one pass.
Step 3
Having completely covered the fabric, open it up and pull it away off a baking sheet. If it is folded or creased, remove them and let it dry flat.
“Soybean Oil & Turpentine”
Because this method uses turpentine, linseed oil poses the same potential dangers. Turpentine and turps are smelly & flammable. Due to its hazardous nature, it should not be flushed through sewer systems or drains.
What You’ll Require:
- Soybean oil
- Bucket
- Turpentine, 1 tablespoon
- 1-inch ling paintbrush
- Facemask
- Spray bottle
- Rubber gloves
Process Of Using Soybean Oil And Turpentine
Step 1
Put on your facemask & gloves, then mix soybean oil and turpentine together. Alternatively, you may use spray bottles or a bucket. Turps isn’t needed in large quantities. It is actually better to use less. According to the amount of fabric you treat, one cup of soybean oil and one tablespoon of turps are required.
Step 2
The fabric can be hung outside or laid on the floor flat. Ensure that the paper is wrinkle-free, fold-free, and crease-free. Combine soybean oil with turps and spray it on the fabric. Additionally, use a paintbrush and bucket to apply the mixture to the surface. Don’t work on both sides at once.
Step 3
After drying the 1st side, turn it over and finish the second side. Let the dry fabric flat after treating it. Ideally, you should do this outside, since turpentine is dizzying and overwhelming.
Step 4
Upon drying, let the fabric air out to remove any remaining odors. Afterward, your waterproof textile can be used. The turps & soybean oil mixture must be disposed of responsibly. Pour it away from your sink or toilet.
Everything You Need to Know About Waterproofing
Upholstery
For a solid barrier against stains & watermarks, “Thompson Fabric Seal Spray” should be applied twice to the upholstery in your dining room. The surface will bead & slide off the water, soda, and condiments, although suede should not be treated this way.
Notebooks & Paper
It is possible to preserve letters and documents using wax or applying alum to them. When it comes to weatherproof notebooks, look no further than the U.S. military. The grunts rely on “Rite in the Rain Memo Books.”
Denim & Canvas Apparel
When waterproofing natural fabrics such as denim, cotton, or canvas, rub “Otter Wax” on them thoroughly. The wax will not leave a residue but will darken and stiffen the fabric to make it look rugged. It is recommended to wear jeans, a work jacket, and an old canvas weekend.
Leather Bags
Although leather cannot be completely weatherproof, some treatments make it more resilient. Make sure you condition it regularly using mink oil and spray protect it if inclement weather is predicted. Every 8 to 10 uses, the spray needs to be reapplied. Alternatively, you can use beeswax conditioner for a darker finish.
Boots & Shoes
If you want to weatherproof your brogues, or even your dress boots with wings, invest in a leather preserver. Wearing warm, dry work boots will weatherproof them practically for free.
Smartphone
Many cases claim to be waterproof, but “Watershot” are especially good for underwater photography. In a less demanding manner, Liquipel provides an invisible and waterproof finish with a 1-year guarantee.
Old Raincoat
As with all possessions, raincoats will wear, and the average coat needs to be treated every year to keep its waterproofing. Fortunately, you won’t need many supplies to complete the project. In Popular Mechanic, the steps are laid out in detail.
Everything Else
There has long been buzz about “NeverWet,” a “silicone nano coat” that waterproofs (really, truly waterproofs) pretty much anything. Coatings only last a limited amount of time, but their power is amazing. Cotton shoes slide off syrup as easily as rain slides off the glass. You can buy it as a multipurpose spray & see how useful it is.
FAQs
01. What Is Used To Make Waterproof Clothes?
Natural and synthetic fabrics are usually coated or laminated with waterproofing materials such as polyurethane (PU), rubber, fluoropolymers, polyvinyl chloride (PVC), silicone elastomer, and wax.
02. Can I Turn Fabric Into A Waterproof Material?
In order to make fabric waterproof, you have to coat it with a waterproof coating. You don’t have to be depressed. You can resist clothes by applying wax or a waterproof layer. “DWR spray” can be used to reapply coating to waterproof cloth.
03. How Can Cotton Fabrics And Natural Fibers Be Made Waterproof?
For waterproofing cotton fabric, natural fabric, hemp, denim, or canvas, waxing is your best option. The fabric will look good if the wax is stiff and darkens it.
04. Why Is My Fabric Not Waterproof?
When washing your fabric, a cloth that changes color is not waterproof. However, the above-mentioned solution can help you resolve the issue.
05. Does Material Have The Ability To Be Waterproof?
Fabric can be made waterproof by treating it with a water-resistant substance. You can choose from many commercial options, such as “Scotchgard,” “Thompson’s Water Seal for Fabric,” and “Nikwax TX Direct.” You can also choose natural options. “Beeswax,” “linseed oil,” and “iron-on vinyl” repel water effectively.
06. How Do You Waterproof A Pair Of Pants?
Make sure the pants are at least 5 inches from the waterproofing spray and spray liberally over the surface. Spray snow pants & fabrics that have already been treated with DWR, as well as cotton & other fabrics that are often used in everyday life.
Conclusion
Waterproofing fabric is easy. Use a commercial spray like “Scotchguard” or DIY technique like “beeswax.” In either case, you can enjoy your outdoor fabrics even during heavy rain.
You now know “how to make clothes waterproof” with very simple and effective tricks. As a suggestion, you might consider using a waterproof fabric which is no longer waterproof. If you want recoated- a wax & alum coating may not penetrate or work in that case, hence; DWR is the only option. Finally, make sure you don’t burn your hand.
Feel free to leave a comment if you liked this article. Would you be willing to share how you waterproofed your fabric? How did you do it? Did everything go well for you?