Last Updated on December 13, 2025 by Wahid
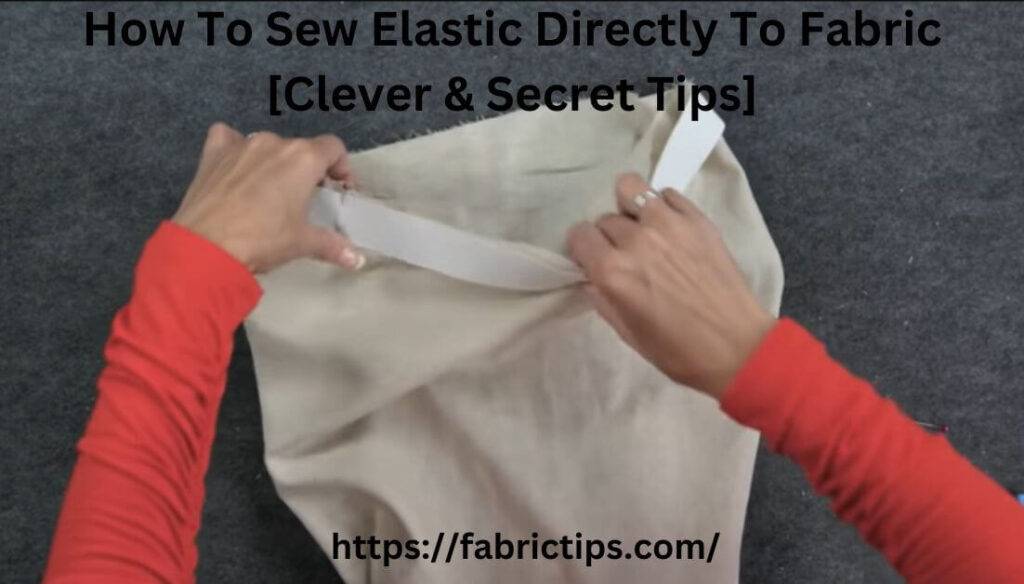
Knowing how to sew elastic directly to fabric can be quite handy, regardless you use a machine or by hand. A plain & boring garment might need some tweaking. Due to the lack of a return policy, the clothing item may need to be altered. Many reasons will arise, but a simple needlework trick can certainly reduce your budget substantially.
In this article, you will learn how to:
- Stitch a casing
- Directly attach elastic to fabric
- Join two elastic pieces together
- Then, together, sew the elastic ends
Wishing you overall working success as you achieve the greatest sewing techniques as quickly as possible. All finished. Hope all goes well.
Check out the following valuable information below.
Actually, Sew Elastic Is Difficult Or Not?

Definitely a challenging task for a novice craftsman, dressmaker, and someone looking to explore DIY techniques.
However, you shouldn’t be sad over the news, since you’ll eventually learn the process of alteration.
Perhaps creating with old, unused fabrics & elastics would be your top priority. By doing this, you will avoid repeating the mistake you made in the previous hemming project.
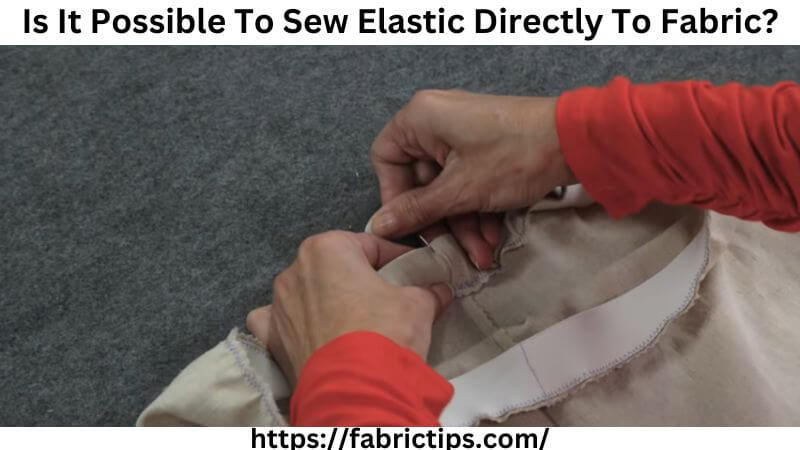
Is It Possible To Sew Elastic Directly To Fabric?
- Throughout history, fashions have evolved to open up a wide range of possibilities. Therefore, you can experiment with many unique designs without fear of being scrutinized.
- In garment factories, it’s likewise common to directly attach elastic to the fabric. It is possible for you to do the same.
- Basically, it is not necessary for you to be a professional tailor to explore this direction.
- Of course, fabric and elastic can be sewn directly together. Even so, it is necessary to figure out which side to put stretchy material on.
- It should be sewn in the right direction, which will be visible after you wear the clothing. Then, you’ll need to work hard.
- The cause is not lost, but rather miscalculated. Don’t miss out on this chance once again. Don’t delay, get your kit now.
How To Sew Elastic Directly To Fabric: 2 Easy Ways & Step-by-Step Tutorial
Here is where the key action begins. Bands can be made by casing or attaching the elastic to the fabric’s edge.
It is best to start from the middle, extending outward, to ensure the elastic distribution is even. When attaching it to a circular frame (sleeves, waistlines, pants’ bottom hems, etc.), stitch together both ends, then sew it into place. You should seal each end multiple times with backstitching.
Method 1:
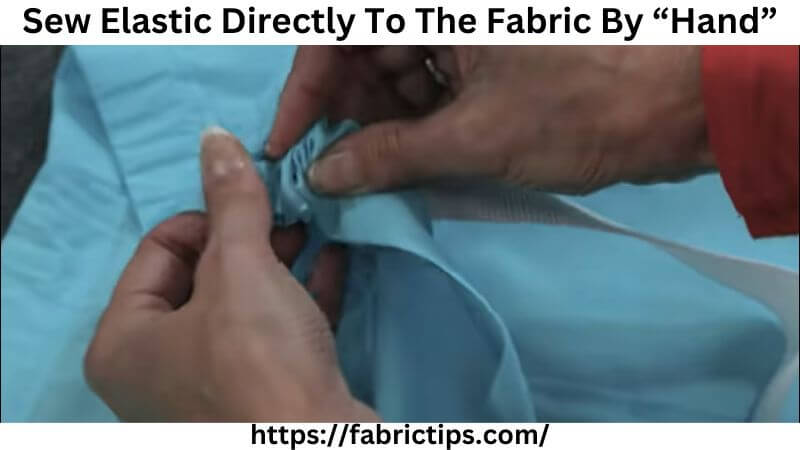
Sew Elastic Directly To The Fabric By “Hand”
Despite the complex work ahead, it is your first task never to become nervous. It isn’t everyone who owns a cute sewing machine that can patch up quickly.
Additionally, there are some skilled embroidery-makers who love to stitch everything using hand needles. Go ahead and enjoy this method if you feel comfortable with it.
Things You’ll Need
- Pins: Some “pins” in your kit to attach the materials.
- Needle: Get the right “needle” for the elastic and garment.
- Scissor: Prepare “scissors” for cutting stuff throughout the project.
- Thread: You can choose any thread version you like, although I prefer polyester.
- Measurement tapes: Measurement tapes are also essential.
Step By Step Sewing Guidelines
The steps below will guide you through the sewing process. Make sure everything is aligned for best results.
Take Individual Measurements
First, accurately measure the area on your body where you intend to use the band. In this case, you will need to measure the waist to determine the amount of elastic needed. For example, for a waist of 30 inches, the elastic must be cut to the same size, whatever fits you best.
Measure The Garment
You will measure the garment section where the elastic will be attached. There will be a larger fabric line, which is why you’re attaching the rubber to shrink it.
Adjust The Sizing
Cut the 30-inch elastic into 2 or 4 inch (5.1 or 10 cm) pieces using scissors. Ideally, it should fit snugly. When the fabric doesn’t require a loop, you can skip this step.
However, the elastic ends will need to overlap a tiny amount if you want a waistband. Repeated backstitching (sewing technique) will prevent detachment.
Connect Elastic To Material
Now, secure the elastic on the fabric with pins. It should be positioned on the backside of the clothing, near where the rubber line will be attached.
Place a few more pins, preferably 4 or 5, evenly spaced along the fabric’s edge. Ensure that the garment doesn’t bunch up.
Start Stitching
It is time to sew them both together. You should pull or tug the elastic constantly until it is the same length as the fabric.
Upon reaching the pin’s intervening position, remove each pin individually. If it’s more convenient for you, you can wait until you’ve sewn everything together.
Upon Completion, Inspect The Work
Check your work’s precision by stretching a little bit. That’s it.
As with waistbands for jeans, trousers, etc., elastic must be covered with extra fabric. You just need to fold it over the band and stitch it at the bottom.
Method 2:
Sew Elastic Directly To The Fabric By “Sewing Machine”
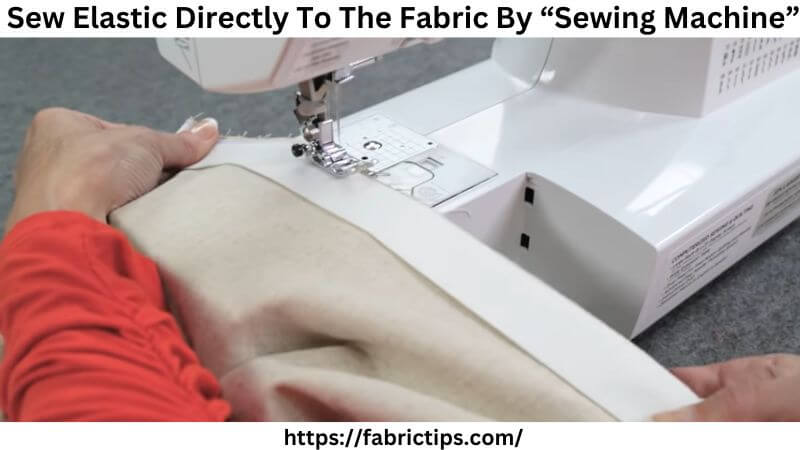
Whether you own a sewing machine or have recently acquired sewing equipment, we have you covered. Lubricate components appropriately to ensure smooth operation. Sewing machines come in many different types.
The manual ones are equipped with a pressure bar & balance wheel under the table. With the bar, you can adjust how fast you sew. When I ran, it created a very calming, almost methodical sound.
Industrial models are usually heavy-duty & computerized. Textile factories use them to produce large quantities of fabric. The sound you hear is probably a humming engine model. The program is useful, cost-effective, & easy to use.
Things You’ll Need
- Pins: Some “pins” in your kit to attach the materials.
- Needle: Get the right “needle” for the elastic and garment.
- Scissor: Prepare “scissors” for cutting stuff throughout the project.
- Thread: You can choose any thread version you like, although I prefer polyester.
- Measurement tapes: Measurement tapes are also essential.
Step By Step Sewing Guidelines
It is basically the same procedure as the hand-sewing method. Well, let’s take a closer look.
Measure Everything Properly
Make sure everything is measured as directed in the instructions. A few inches shorter is best for elastic if the material is 30 inches, such as 28 inches.
Join Fabric & Elastic Together
Next, place the elastic over the fabric (on its wrong side). If you want to sew on a straight line, begin from the middle; this will ensure that the elastic is stretched evenly within each interval.
Both elastic ends should be attached to the fabric with the remaining two pins.
Start Sewing
Begin sewing at the midpoint with the machine. Make sure the elastic is constantly pulled to create an equal length stitch to the textile. Once you have stitched one side, turn the fabric over and stitch the other side.
This procedure should be followed even when dealing with circular garments (waistbands, sleeves, etc.).
Create A Casing Hem
Whenever you want to create a casing design, begin by cutting a hem around the area.
Make sure the elastic is wide enough to allow the elastic to enter through the hemming.
Creating 1 or 2 Openings
Leave a small section of the garment unstitched where the elastic will be inserted. Secure one end with a safety pin.
Insert Elastic Along The Hem
Put it in the hem until the pinched edge emerges from the opposite opening or from the first one after looping.
How To Make A Elastic Casing: 7 Steps
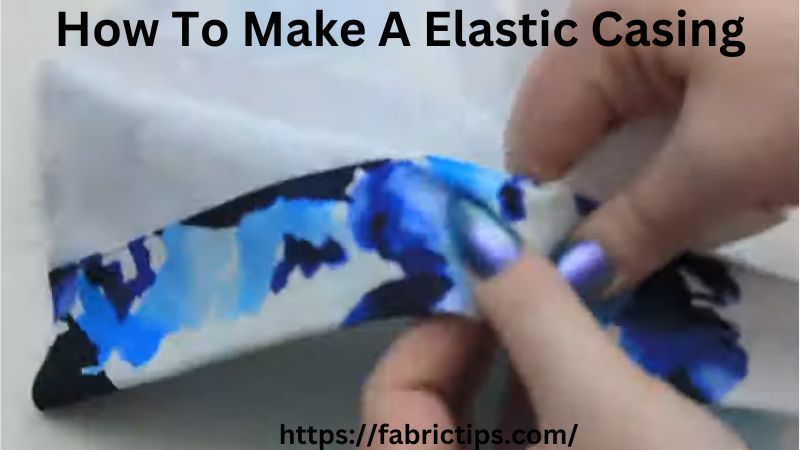
Casings are fabric tubes into which elastic can be inserted. It is typical for elastic to be shorter than tube length, resulting in gathering of the fabric. In many cases, casings are used for gathered sleeves, waistbands, and cuffs on trousers. The following is one way of making a quick and easy casing.
Step 1: Finished The Raw Edges
- Make sure your raw edge is finished, either by serging it or folding it up.
- Then, stitch it with a ¼ inch (6 millimeter)) hem allowance.
Step 2: Fold
- Make sure your fabric’s edge is on the wrong side when you fold it over.
- To finish a raw edge with a serger, fold your fabric to the width of the elastic plus ⅛ inch (3 millimeters) for easier work.
- For folded raw edges that are stitched down, fold your fabric ¼ inches plus the elastic width (6 millimeters).
- It must now be pressed and pinned down.
Step 3: Stitch
- The casing should be stitched almost to the edge, allowing the elastic to go through the gap.
Step 4: Trim The Elastic
- The elastic should be trimmed to the appropriate length.
Step 5: Insert The Elastic
- Depending on the elastic and the fabric, the process may be easier or more difficult.
- You can simplify the process by pinning a safety pin into one end securing the elastic.
- By doing this, you’ll be able to pull the casing through with something solid.
Step 6: Finish The Loop
- Now that the elastic has been threaded inside the casing, it shows through both holes.
- Put the ends together, overlapping each other, then sew them together with the sewing machine.
Step 7: Finish
- After inserting the elastic, close and secure the hole with your sewing machine.
- It could also be stitched by hand.
Different Types Of Elastic

Typically, there are several types of elastic you can find in a craft store. In the following, we will explain the differences between them as well as which types are most effective for different projects.
Braided Elastic
“Braided elastic” is extremely lightweight while being able to narrow when stretched. Ideally, it should be used with lightweight textiles or where there won’t be much stretch, such as the cuff of a sleeve. Over time, when stretched to its maximum, braided elastic loses its elasticity.
The material should be used only in channels or elastic casings, as sewing directly onto fabric will lose all its stretch.
Knitted Elastic
“Knitted elastic” feels soft, is highly flexible, and is extremely versatile. The material can be sewn directly on fabric or used in channels. In addition to being extremely soft, this material works well for waistbands because it can be directly touched by skin. Fabrics that are medium to lightweight are well suited for knitted elastic.
Woven Elastic
“Woven elastic” is strong and thick, but it is less soft than knitted elastic. Ideally, it should be used on heavier fabrics, like velvet or canvas. A direct application on fabric is possible, as well as a channel and casing application.
Elastic Thread Or String
“Elastic thread/string” features extremely thin thickness, lightweight, & versatile. It’s perfect for gathering material, and it creates a ruched, shirred look. Using it in a sewing machine’s bobbin is even possible. Whenever lightweight fabrics are used, it works best and is most suitable for ruching.
Clear Elastic
“Clear elastic” has a very thin & durable texture, plus, of course, it’s clear. In addition to being stretchable up to 4 times its original size, it makes a great activewear item. Clear elastic is ideal for adding elasticity and stability to seams at risk of unraveling over time, such as shoulder seams.
Fashion Elastic
“Fashion elastic” is available in a wide range of colors and prints. It is intended to be visible on the exterior of the outfit, such as on a skirt’s waistband. A number of thicknesses are available in fashion elastic. It is intended to be sewn directly through the fabric, allowing the pattern to be visible.
Fold Over Elastic
“Fold over elastic” features a groove running through the center. On knit fabrics, it’s used for sewing patterns on clothing such as gymnastics costumes and underwear.
6 Different Types Of Stitches For Elastic
If you want to sew elastic to fabric, you have see 6 main options below.
Overlock Stitch
“Overlock Stitch” is an easy and simple stitch that holds the elastic tightly during stitching. In order to do this, stitch a few times along the same line as the elastic, then stitch perpendicular to them.
This stitch does not really secure anything by itself, as you can see.
Linger Stitch
“Linger stitch” can be done by understitching or blind hemming the elastics thread and anchoring it with one end.
Following this, you take 2 overlapping running stitches over each anchor and repeat this until you reach the reverse side.
There are lines sewn both above & below the elastic, which means there won’t be any through-pulling when the elastic is pinned in place.
Basting Stitch
“Basting stitch” is a long, loose stitch that holds fabrics together until the final seams are removed. Using this stitch, the fabric is caught on either side of the elastic and pulled tight thereby securing it.
Blind Hemming Stitch
If you are “blind hemming stitch” a fabric, you should take a running stitch or baste in the wrong direction, turn it over, and sew the right side.
On the right fabric side, make a 2nd running stitch, then, secure it by pulling it tight in place.
Catch Stitch
“Catch stitches” can be made by overcasting or zigzagging and tying a knot at the end of the elastic thread. Below this 1st anchor point, you can sew 2 parallel stitches along the elastic thread until the opposite end is reached.
Pleat Stitch
Take a running “pleat stitch” on the fabric and allow it to become wrong side up by taking it right side up.
For the panel to stay in place, you will need to stitch equally on the wrong side. You will be able to position it flat on your head or neck up until the elastic thread is reached.
Next, you will stitch one running stitch down the wrong side of your fabric, making sure it is secure by pulling it tight.
FAQs
01. How Can You Sew Elastic To Gather Fabric?
Answer: Whether you like bunched-up or gathered décor, what should you do? It’s as simple as following the instructions above. It’s only important to keep one thing in mind. Match the elastic length carefully to the edge of the fabric where it will be attached. The rubber is clipped more at this time. For a fabric length of 30 inches, as example, shorten the elastic by 5 to 6 inches. After sewing, the clothes will be more gathered if you cut more.
02. Which Is The Best Fabric For Sewing Elastic?
Answer: The 2 types of fabric you can use are “woven” and “knit.” Sewing elastic directly to fabric depends on its type, so understanding the differences is essential. The weave of woven fabric is tight with vertical and horizontal threads; however, knitted fabrics have vertical threads only.
03. Do You Stretch Elastic When Sewing?
Answer: In knit fabrics, elastic will stretch, but not in woven fabrics. Elastic’s width determines whether it stretches – when it is narrow, it also stretches when sewn to either fabric. But if it’s wide, you can’t stretch it when sewing it to woven fabric.
04. How Do You Sew Elastic To Itself?
Answer: 2 methods are available for connecting elastic pieces.
- First, stitch the ends together with a zigzag stitch by laying the ends over each other.
- Alternatively, a piece of fabric can be used to connect the elastic ends. By doing this, you will get a stronger bond, which won’t leave lumps like when you simply sew them together.
05. Can I Use Elastic Thread In My Sewing Machine?
Answer: Of course, YES.
- First, make your bobbin wind by hand. Be careful not to stretch the elastic. Make sure your bobbin is inserted correctly.
- Next, thread the regular thread onto your top thread.
- Now, increase the stitch length to 3 or more. Don’t forget to sew some test rows!
- You should never cut elastic thread with a sewing machine’s automatic thread snipper, since this will result in too short ends.
06. What Is The Best Stitch For Sewing Elastic?
Answer: Zip-zag stitches are the best stitch for sewing elastic. Make sure your zig-zag stitch is medium length when sewing elastic to your fabric. When sewing elastic ends together, you can use a straight stitch or a zig-zag stitch. Be sure to backstitch well.
07. Do You Stretch Elastic When Sewing?
Answer: The elastic often stretches when sewn to the elastic. You will usually find that the elastic is smaller than the fabric raw edge on which you’ll sew it. The amount by which it’s stretched depends on the elastic type and the fabric length you’re sewing. Normally, elastic measures one to two inches longer than the waist measurement.
08. Is A Special Thread Needed To Sew Elastic?
Answer: A high-quality polyester thread should be used when sewing elastic. Make sure you choose a trusted brand like Coates, Rasant, or Gutermann. There is less risk of a quality thread snapping or skipping stitches.
09. How Do You Join Two Elastic Pieces Together?
Answer: Join elastic ends by overlapping them by ½ to 1 inch. Then sew both layers together either with a straight stitch or a zig-zag stitch. When sewing with a straight stitch, the stitch can be made into vertical lines or square shapes. In this way, the elastic won’t come unstitched.
10. Why Won’t My Sewing Machine Sew Over Elastic?
Answer: Whenever your machine has trouble sewing elastic, probably has one of 3 problems. Using the wrong needle is the most common problem. It is best to sew elastic with a ballpoint needle or a stretch needle. Skipping stitches can be caused by using a universal needle. Both the top & bobbin thread should be smooth and good quality. Finally, switching to one with Teflon or a walking foot might help.
Words Of Wisdom
A waistband, neckline, or wristband containing elastic is a fast way to create simple garments. Either attach the elastic along the edge or create a casing and thread it through.
Do you worry about how to sew elastic directly to fabric easily without breaking your brain? Let me explain the details further to brighten your day. Depending on your preference, you can sew manually or use a machine. Attach the elastic with the appropriate gaps to the fabric section. Keep the elastic stretched to match the ends as you sew the fabric. With a waistband, elastic ends must be stitched several times.
However, consider how much stretching your clothing may withstand. Directly sewing elastic into fabric is easy. How? Hopefully, this guide will assist you in sewing elastic to clothing correctly.