Last Updated on December 13, 2025 by Wahid
Dreaming of transforming your space with a touch of texture and personality? Look no further than fabric wallpaper! Not only is it a budget-friendly alternative to traditional wallpaper, but it also allows you to unleash your inner designer with a vast array of colors, patterns, and textures.
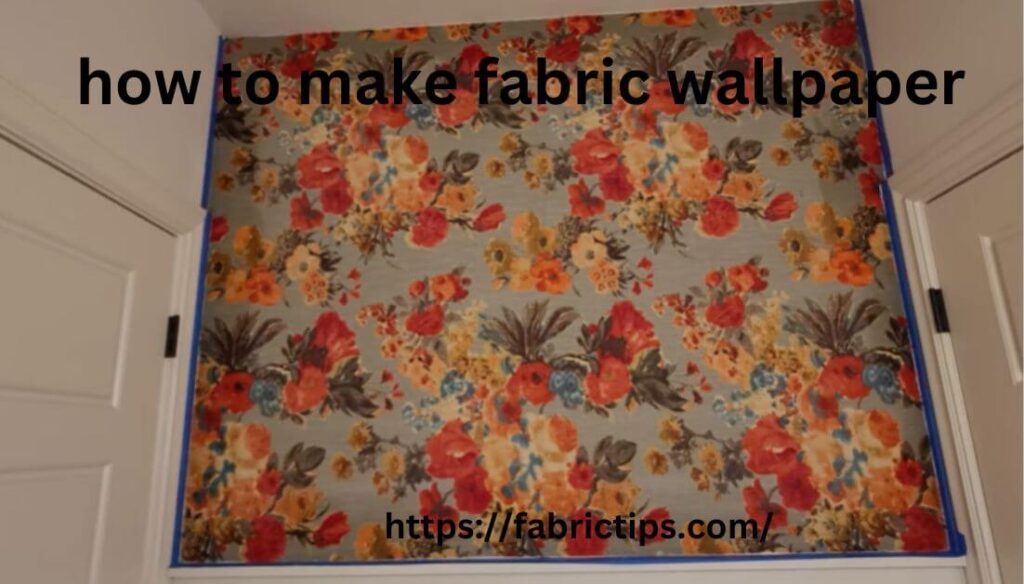
However, before you dive headfirst into a wallpaper wonderland, let’s ensure a smooth (pun intended) experience! This comprehensive guide will equip you with knowledge and insider tips on how to make fabric wallpaper, from essential warnings to pro application secrets. Hence, grab your measuring tape, unleash your creativity, and get ready to transform your walls with the magic of fabric wallpaper!
Essential Warnings & Considerations: Before You Dive In
Fabric wallpaper can add a stunning touch to your space, but there are a few things to consider before you start transforming your walls. Here are some key points to keep in mind:
- Fabric Choice is Critical: Not all fabrics are suitable for wallpaper. We’ll delve into the importance of selecting breathable, tightly woven materials to prevent moisture buildup and potential mold growth. Additionally, these fabrics will adhere better to the wall for a long-lasting application.
- Wallpaper Paste Matters: Don’t be tempted to use leftover regular wallpaper paste. Learn about choosing the right fabric-specific paste for optimal results. We’ll explain how the right paste ensures proper adhesion and prevents damage to your fabric.
- Surface Prep is Key: Uneven walls can show imperfections even through fabric. We’ll guide you on essential steps like cleaning, filling minor holes, & sanding for a smooth canvas that allows your fabric wallpaper to shine truly.
- Planning Prevents Headaches: Meticulous measurements are crucial! We’ll provide tips on accurately measuring your wall space & factoring in pattern repeats to ensure you order enough fabric and avoid mismatched patterns.
- Removal Reality Check: Be aware that fabric wallpaper removal can be trickier than traditional wallpaper. It might require more time and effort. We’ll manage your expectations & provide some tips for making the removal process as smooth as possible.
Must-Have Materials & Tools for Fabric Wallpaper Success

Now that you’ve considered the essential warnings, let’s gather the tools and materials needed to create your dream fabric wallpaper!
- The Perfect Fabric: We’ll explore the best fabric choices for you, taking breathability, texture, & budget into account. From the classic versatility of muslin to the rustic charm of canvas, you’ll find the perfect option to match your vision and style.
- Fabric Wallpaper Paste: Don’t settle for anything less than high-quality, pre-mixed fabric wallpaper paste. We’ll recommend specific brands known for their effectiveness and ease of use. Remember, the right paste is crucial for a successful application.
- Precise Measurements: Accuracy is key! A reliable measuring tape will ensure your fabric panels fit perfectly on your walls, minimizing waste and frustration.
- Sharp Cutting Tools: Clean cuts are essential for a professional finish. We’ll discuss the pros and cons of using scissors or a rotary cutter to help you choose the tool that best suits your comfort level & project needs.
- Smoothing Duo: A paint roller and tray will be your allies in applying the paste evenly to your walls. A seam roller will become your best friend for creating a seamless look by pressing down firmly on seams & eliminating air bubbles.
- Precision is Key: A level will help you maintain a straight application of your fabric panels, while a utility knife will come in handy for trimming any excess fabric around the edges.
- Don’t Forget the Details: A paintbrush will be useful for applying paste to corners and edges, ensuring complete coverage. Finally, drop cloths will protect your floors from spills & splatters during the application process.
Calculating Fabric Needs: Avoiding Fabric Faux Pas

Before diving into the exciting world of cutting fabric, let’s ensure you have enough to cover your walls without any last-minute scrambles. Here’s how to calculate the perfect amount of fabric for your project:
- Measure Your Wall Space: This is the foundation! Grab your measuring tape & meticulously measure the height and width of each wall you plan to cover. Multiply these measurements to determine the square footage of each wall.
- Pattern Repeat Matters: Not all fabrics are created equal! If your chosen fabric features a pattern repeat (the distance at which the pattern starts over), you’ll need to factor that in. We’ll provide a clear formula that considers the repeat size to ensure your pattern matches seamlessly across the entire wall.
- Overlaps for Perfection: Don’t underestimate the importance of overlaps! Allow an extra 2-3 inches of fabric on all sides (top, bottom, left, and right) for smoother hanging and trimming. These overlaps will be hidden behind trim or tucked into corners for a polished final look.
- Buffer for Mistakes: We’re all human! To account for potential mishaps or imperfect cuts, it’s wise to purchase an additional 10% of fabric. This buffer ensures you have enough material to complete the project even if there are minor miscalculations or mistakes during the cutting process.
Ultimately, by following these simple steps, you’ll be able to calculate the exact amount of fabric needed for your stunning fabric wallpaper project. Also, you can avoid any unnecessary stress or fabric shortages.
Step-by-Step Guide How to Make Fabric Wallpaper
Now that you know material needs and essential warnings, let’s embark on the exciting journey of creating your very own fabric wallpaper. Follow these steps closely, & you’ll be well on your way to achieving a stunning and unique wall transformation.
Step-1: Washing and Ironing
Not all fabrics require pre-washing, but some might have sizing or finishes that can affect adhesion. We’ll guide you on identifying fabrics that benefit from pre-washing to remove any sizing or shrinkage. Additionally, ironing out wrinkles from washable fabrics ensures a smoother application process.
Step-2: Cutting Fabric Panels with Precision
Grab your measuring tape and follow our detailed instructions for measuring and cutting your fabric panels. We’ll factor in wall dimensions, overlaps for a polished look, & even guide you on how to account for pattern repeats to achieve a seamless design across the entire wall.
Step-3: Preparing the Fabric Wallpaper Paste
Mixing the paste correctly is crucial for a successful application. We’ll provide clear instructions following the manufacturer’s recommendations, ensuring you achieve the optimal consistency for a smooth & secure bond between the fabric and the wall.
Step-4: Applying Paste to the Wall
It’s time to prep your walls for the fabric magic! We’ll guide you through a step-by-step process of using a paint roller to apply the paste evenly onto a manageable section of the wall. Remember to start from the top and work your way down to avoid drips and ensure complete coverage.
Step-5: Hanging the Fabric Panel with Care
Here comes the fun part! We’ll provide detailed instructions on carefully placing the fabric panel onto the pasted wall section. Learn how to smooth out any air bubbles as you go for a flawless application.
Step-6: Repeat and Match Seams
Once you’ve mastered hanging the first panel, it’s time to conquer the rest! We’ll guide you through the process of applying the paste & hanging additional fabric panels until your entire wall is covered. This step also emphasizes the importance of meticulous pattern matching for a professional look.
Step-7: Trim Excess Fabric for a Flawless Finish
Once all the fabric panels are in place, it’s time for some precision trimming. We’ll show you how to use a utility knife carefully to trim any excess fabric around the edges, including corners and baseboards, for a clean and polished finish.
Step-8: Let it Dry Completely
Patience is a virtue! The final step is to allow the fabric wallpaper to dry completely. We’ll explain the importance of following the paste manufacturer’s drying instructions to ensure a secure bond & prevent any peeling or warping.
Finally, by following these comprehensive steps & utilizing the valuable tips, you’ll be best about how to make fabric wallpaper perfectly. In this way, you can create stunning fabric wallpaper that transforms your space with a touch of personality and texture.
Choosing the Perfect Fabric: Your Design Canvas Awaits
Now that you’ve mastered the essential steps and considerations for creating fabric wallpaper, it’s time to unleash your inner designer by choosing the perfect fabric. The fabric you select will not only impact the aesthetics of your space but also play a role in the application process. Here are some popular options to consider:
- Muslin: Breath of Fresh Air & Affordability
Muslin is a popular choice for fabric wallpaper due to its breathability and affordability. This tightly woven, lightweight fabric comes in a variety of colors and is relatively easy to work with. Hence, muslin is a great option for creating a clean, minimalist look or a soft, romantic atmosphere.
- Canvas: Texture Makes a Statement
For a more textured look and a touch of artistic flair, canvas is a fantastic option. This heavier fabric offers a natural variation in texture & is perfect for creating a rustic or industrial vibe. While slightly more challenging to work with due to its weight, canvas can add a unique dimension to your space.
- Luxurious Linen: Elegance with a Price Tag
Linen is a dream come true for those seeking an elegant & sophisticated touch. This natural fiber offers a beautiful drape and a luxurious feel. However, linen tends to be more expensive than other options and requires more delicate handling during application. If you’re looking for a timeless and luxurious addition to your space, linen might be the perfect choice.
- Creative with Upholstery Fabric: Think Outside the Box (Remnants!)
For the budget-conscious and design-savvy DIYer, consider using leftover upholstery fabric remnants! This is a fantastic way to add a unique touch to your space & utilize leftover materials. However, ensure the upholstery fabric you choose is breathable & not too thick for successful application.
We’ll delve deeper into the specifics of each fabric choice, including its pros and cons, application considerations, and design possibilities. This will empower you to make an informed decision that aligns with your budget, desired aesthetic, and skill level.
How To Remove Fabric Wallpaper

While fabric wallpaper adds beauty and texture to your walls, there might come a time when you desire a change. Removing fabric wallpaper can be trickier than removing traditional wallpaper, but with the right approach and a little effort, you can tackle this task like a pro. Here’s a breakdown of the fabric wallpaper removal process:
Gather Your Supplies:
- Spray Bottle: Filled with a warm water and white vinegar solution (equal parts)
- Scoring Tool: A tool with a pointed wheel to create perforations in the fabric
- Putty Knife: For scraping off loosened fabric
- Sponge: For wiping down the wall
- Drop Cloths: To protect your floors
The Removal Process:
- Safety First: Turn off the electricity to any outlets near the wall you’re working on.
- Prepare the Solution: Mix equal parts warm water and white vinegar in your spray bottle. This solution helps loosen the adhesive.
- Score the Fabric: Using your scoring tool, create small perforations in the fabric surface. This allows the vinegar solution to penetrate deeper & break down the adhesive more effectively.
- Spray and Wait: Generously spray a section of the fabric wallpaper with the vinegar solution and let it sit for 15-20 minutes. The fabric should start to loosen from the wall.
- Gently Scrape: Using a wide putty knife at a low angle, carefully scrape away the loosened fabric. Be patient and avoid using excessive force to prevent damaging the wall beneath.
- Repeat and Rinse: Continue spraying sections of the fabric wallpaper, waiting for the solution to work its magic, & then gently scraping it away. Once the fabric is removed, use a clean damp sponge to wipe down the wall and remove any residual adhesive.
Pro Tip: A steamer can be a helpful tool for loosening stubborn adhesive. However, use caution & avoid over-steaming, which can damage the drywall.
Disposal: Fabric wallpaper scraps can typically be disposed of with regular household waste. However, always check with your local waste disposal guidelines for any specific recommendations.
Remember: Removing fabric wallpaper can be a time-consuming process. So, be prepared to invest some effort and patience, & don’t hesitate to take breaks when needed.
Pro Tips for Applying Fabric Wallpaper Like a Champion
Now that you’ve explored the essential steps and considerations for creating stunning fabric wallpaper, let’s elevate your skills with some pro tips. These expert tricks will ensure a smooth application process and a flawless finished product.
- Become a Master Measurer: Double (or even triple) check your measurements before cutting your fabric panels. Remember to factor in overlaps, pattern repeats, and any imperfections on the wall that might require adjustments.
- Prime Time (Optional But Powerful): For added peace of mind, consider priming your walls with a stain-blocking primer, especially if you’re using a light-colored fabric. This can help prevent any potential bleeding from the wall through to the fabric.
- The Power of Pre-Hanging: Before permanently adhering the fabric to the wall, consider hanging a dry test panel to check for pattern matching & overall visual impact. This allows you to make any adjustments before committing to the final application.
- Partner Up for Success: Hanging fabric wallpaper can be a two-person job, especially for larger walls. Having an extra pair of hands can help smooth out the fabric, ensure even paste application, & prevent wrinkles or air bubbles.
- Think Like a Pro (Seams That Disappear): When hanging multiple fabric panels, aim to have seams fall in corners or along natural breaks in the wall. This will make them less noticeable and create a more seamless look.
- Don’t Forget the Corners: Corners can be tricky spots. Use a paintbrush to apply paste to the corner and use a seam roller to ensure the fabric adheres firmly in these areas.
- Utility Knife Magic: A sharp utility knife is your best friend for clean and precise cuts. Use a straightedge to guide your cuts for a professional finish, especially when trimming around outlets or light switches.
- Clean Up as You Go: Wipe away any excess paste spills immediately with a damp cloth to prevent them from drying & becoming more difficult to remove later.
- Patience is Key: Resist the urge to rush the drying process. Allow the fabric wallpaper to dry completely as per the paste manufacturer’s instructions. This ensures a strong bond and prevents peeling or warping.
- Embrace the Imperfections: Fabric wallpaper adds a touch of texture and character to your space. Don’t strive for absolute perfection. Minor imperfections can actually add to the charm and uniqueness of your DIY creation.
Generally, by incorporating these pro tips into your fabric wallpaper application process, you’ll achieve a professional-looking finish that will transform your space & leave you feeling proud of your DIY accomplishment!
FAQs
Q-1. What type of fabric is best for wallpaper?
Answer: Not all fabrics are created equal! Breathable, tightly woven options like muslin, canvas, or linen are ideal. Avoid thick or heavily treated fabrics that might not adhere well or cause moisture problems.
Q-2. Can I use regular wallpaper paste for fabric?
Answer: Absolutely not! Regular wallpaper paste is not strong enough for fabric and can lead to peeling or bubbling. Use a high-quality, pre-mixed fabric wallpaper paste specifically formulated for this application.
Q-3. Do I need to wash the fabric before using it for wallpaper?
Answer: Not always, but it depends on the fabric. Pre-washing can remove sizing or finishes that might affect adhesion. Wash light-colored, natural fabrics like muslin or linen. Heavily treated or synthetic fabrics might not require pre-washing.
Q-4. How much extra fabric do I need?
Answer: Factor in overlaps and potential mishaps! Allow an extra 2-3 inches on all sides (top, bottom, left, & right) for trimming and a polished look. Purchase an additional 10% of fabric for a buffer in case of mistakes or imperfect cuts.
Q-5. What tools do I need to hang fabric wallpaper?
Answer: You’ll need a measuring tape, sharp cutting tool (scissors or rotary cutter), paint roller and tray, seam roller, level, utility knife, paintbrush, and drop cloths.
Q-6. How do I remove fabric wallpaper?
Answer: Removing fabric wallpaper requires more effort than traditional options. You’ll need a spray bottle with a vinegar solution (water and white vinegar), a scoring tool, a putty knife, a sponge, and drop cloths. Score the fabric, spray with the solution, and carefully scrape away the loosened fabric. Patience is key!
Q-7. Is fabric wallpaper renter-friendly?
Answer: It depends on the type of fabric, the wall surface, and the removal process. While generally easier to remove than traditional wallpaper, it can still damage walls if not done carefully. Talk to your landlord beforehand and consider using a removable fabric paste if allowed.
Q-8. Can I paint fabric wallpaper?
Answer: Technically yes, but with limitations. Choose a fabric-friendly paint and test it on a small area first. Fabric wallpaper’s texture might affect the paint finish, and multiple coats might be necessary. Consider the overall effect and if the painting aligns with the aesthetic you’re aiming for.
Q-9. How long does fabric wallpaper last?
Answer: Fabric wallpaper can last for several years with proper care. Factors like fabric quality, application technique, and environmental conditions can affect its longevity.
Q-10. What are some alternatives to fabric wallpaper?
Answer: If you’re looking for a similar textured look, consider peel-and-stick wallpaper with a fabric-like design. For a more traditional approach, explore removable wallpapers or vinyl wallpapers that offer a wider variety of patterns and textures.
The Bottom Line
This comprehensive guide has equipped how to make fabric wallpaper and insider tips to embark on this exciting DIY project with confidence. From essential warnings & material considerations to step-by-step application instructions and pro application secrets, you now have all the tools you need to create stunning fabric wallpaper that reflects your style.
Yes, with a little effort and the knowledge you’ve gained from this guide, you can transform your bare walls into a work of art! Thus, grab your measuring tape, unleash your inner designer, & get ready to create a space that reflects your unique personality. The world of fabric wallpaper awaits, and the possibilities are endless!